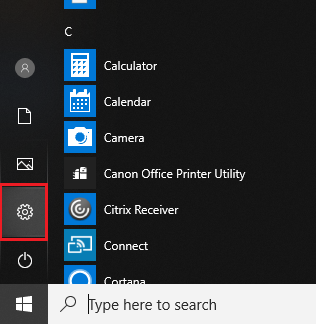
Step 1 - Open the Start menu and go to Settings.
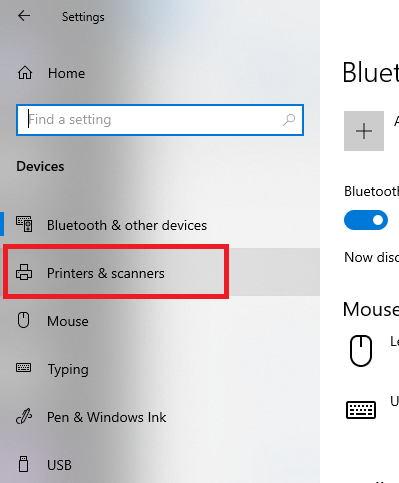
Step 2 - Next, go to Devices > Printer and scanner.
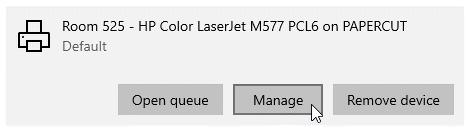
Step 3 - Click on the Printer that you want to select as your Default then click the [Manage] button.
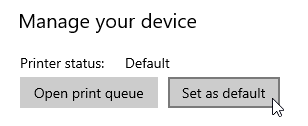
Step 4 – Click the [Set as Default] button.

Step 1 - Open the Start menu and go to Settings.
Step 2 - Next, go to Devices > Printer and scanner.
Step 3 - Click on the Printer that you want to select as your Default then click the [Manage] button.
Step 4 – Click the [Set as Default] button.
Comments
0 comments
Article is closed for comments.